In part one of this series on our Facebook Ads workflow for beginners, we talked about our overall project and Part I of our workflow. If you haven't read that post yet, you should review it first to get the most out of this post about Phase II.
As a refresher, here's the overview of our course workflow.
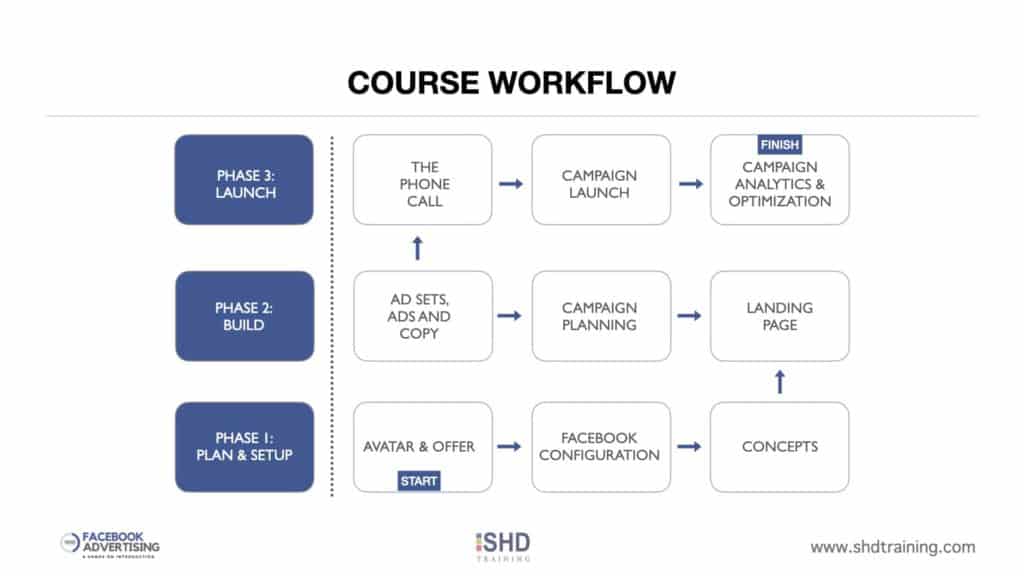
In our Build phase we setup our landing page, plan our campaign, and setup our ad sets and ads.
4. Landing Page
Your landing page is the off-Facebook page where you will send the visitors who click the link in your FB ad. There are a variety of solutions you can use to generate a landing page including ClickFunnels (full disclosure: I have an affiliate link), Thrive Themes Architect for WordPress (I use it regularly), as well as Lead Pages (I used to use it but I use the above two instead). You could also use a regular WordPress installation with Gutenberg, or a page-builder such as Divi to make your landing pages. Ultimately it doesn't matter how you get there, as long as you get there!
The landing page should be a singe page without navigation that focuses on your offer and the benefits of your offer. You should have a headline with interesting text ("Tired of wasting money on Facebook Ads?" or "DIY Facebook Ads" or "Curious About Demystifying Facebook Advertising?") and a list of the benefits of your offer. Your offer should be clear and easy to understand (SAVE 25% until 4/1/21, etc.) and you should have a form with a clear call-to-action.
Depending upon the type of offer you have, you may or may not want to collect a phone number, but at a minimum you want to capture the user's first name, last name and email address. A phone number is ideal because it's clearly easier to get in touch with someone over the phone vs. via email. Lastly, your form needs to send you a notification when someone opts-in so you know that you need to get in touch with a new lead. Most of the aforementioned products can be configured to send a notification email.
5. Campaign Planning
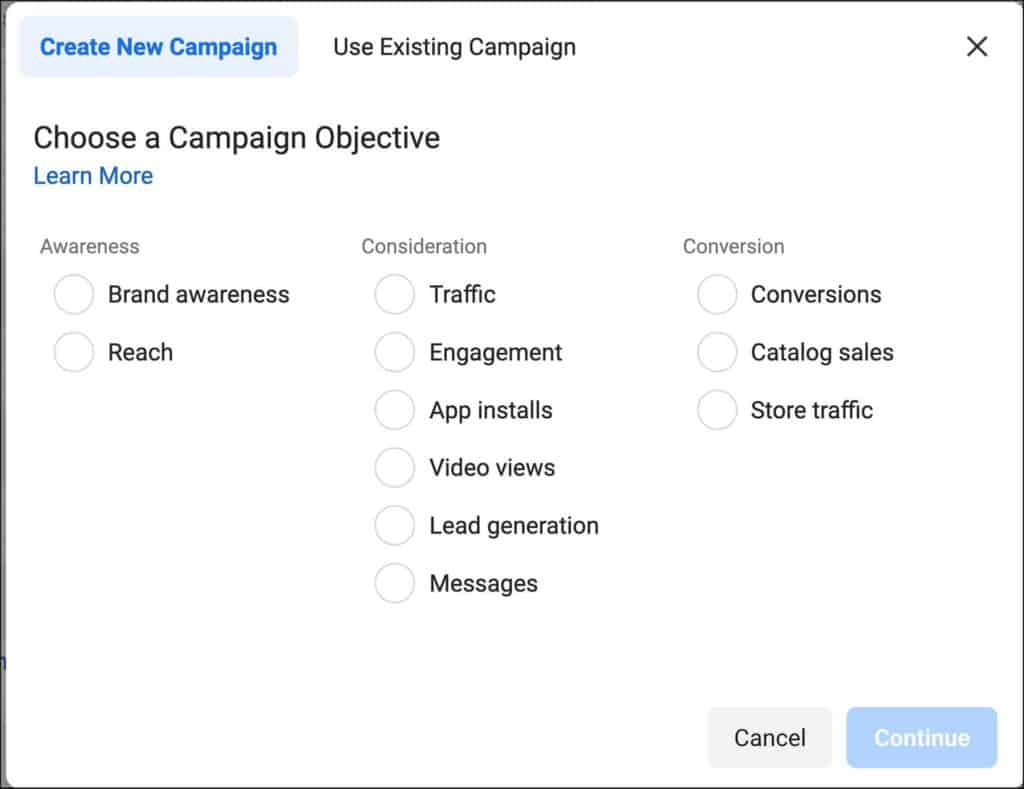
Facebook has a number of campaign types that you can select based upon the goal of your ad; we touched upon this briefly in Part I. For this introduction, you can try a conversion goal with a landing page as your tracked action, or a purchase. But for larger-ticket items, I generally recommend going with a conversion/purchase objective since this objective targets the people most likely to make a purchase. You will pay more for a conversion objective vs. a landing page objective, but since you are presumably selling a high ticket item, the advantage in getting early successes and data outweighs the increased cost.
6. Ad Sets, Ads and Copy
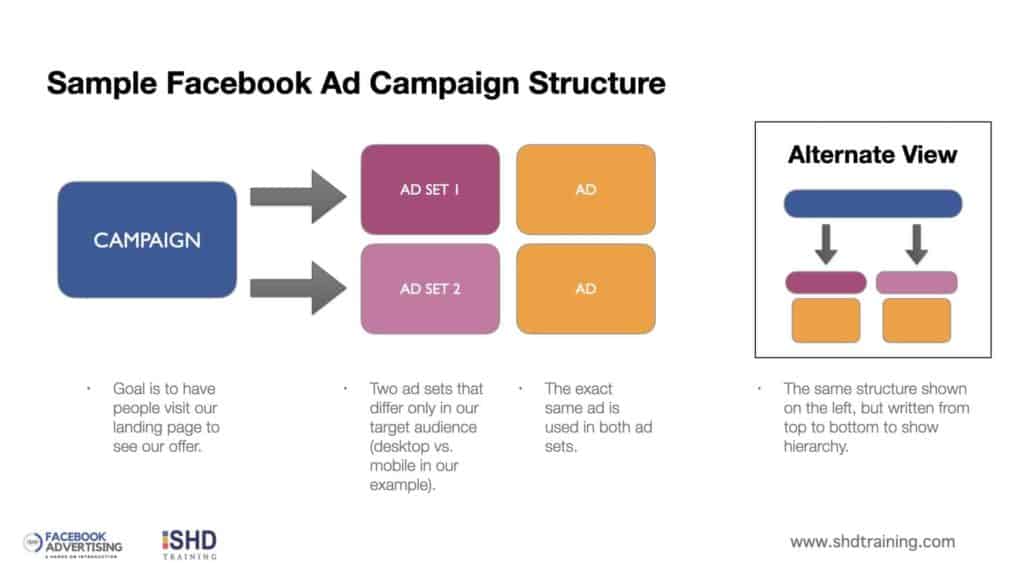
We could do an entire course on ad copy alone, and in our Facebook course and training we have a dedicated module to the subject. The general rule for beginning advertisers is to create an ad and then run that ad under multiple ad sets. Thus, the only thing that changes in your campaign is the audience (ad set). By using the same ad in both ad sets, you are able to track specifically which audiences engage with your ad -- and which don't. And if you find that you have zero engagement across both ad sets, it might make sense to try a different ad.
Split Testing
A discussion about Ad Sets, Ads and copy is incomplete without talking about split testing. Split testing or A/B testing is the process by which you run controlled tests on your campaigns, ad sets or ads. The most important thing to remember is to only test ONE variable at a time. So you might have a campaign that runs in the US and a testing campaign that you run in the UK or Canada to see if there's a difference in your result. Or, you might take an ad set and split test an age group (25-35 vs. 26-45). Lastly, you can test your ad itself with different headlines (or a different image or call to action). Generally you want to get the audience correct first with the ad set, and then once you have the audience, you split test the ad.
In Part III of our series we'll talk about Phase III: the Launch.
